Are you ready to take your dessert game to the next level? Black Forest cake is a classic, but there are so many fun twists you can try out! From the traditional layers of chocolate and cherries to no-bake versions and even mini cakes, there's a recipe for everyone. And if you think you can't enjoy this treat as a vegan, think again! Let's uncover the five best Black Forest cake recipes that'll have your taste buds dancing.
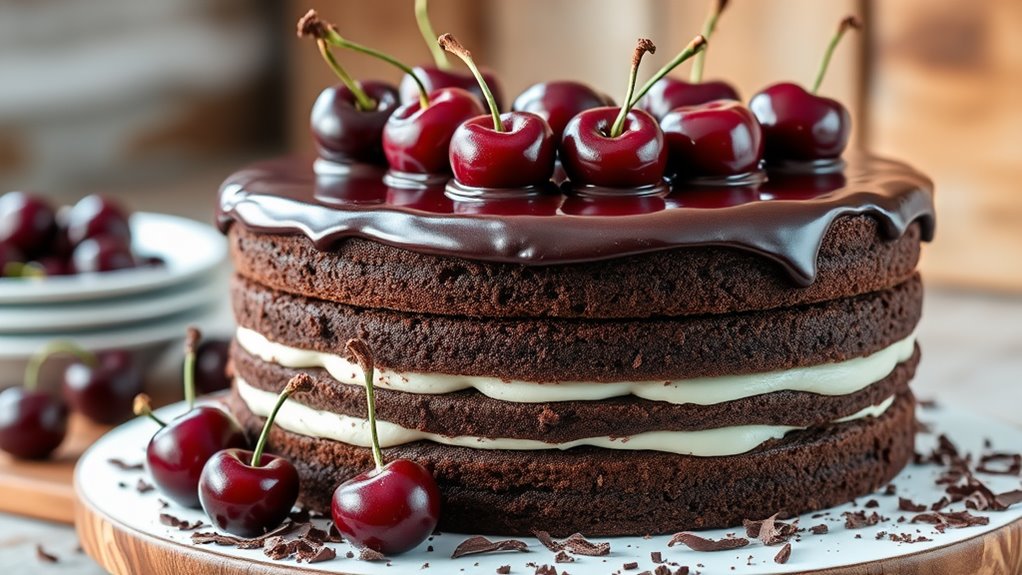
Traditional German Black Forest Cake
Traditional German Black Forest Cake, known as Schwarzwälder Kirschtorte, is a delightful dessert that combines rich chocolate cake layers with whipped cream and tart cherries. Originating from the Black Forest region of Germany, this cake isn't only visually stunning but also a delicious treat that embodies the essence of German baking. The use of Kirschwasser, a cherry schnapps, adds a unique flavor that raises the cake to a whole new level of indulgence.
Ingredients:
- 2 cups all-purpose flour
- 2 cups granulated sugar
- 3/4 cup unsweetened cocoa powder
- 1 1/2 teaspoons baking powder
- 1 1/2 teaspoons baking soda
- 1 teaspoon salt
- 2 large eggs
- 1 cup whole milk
- 1/2 cup vegetable oil
- 2 teaspoons vanilla extract
- 1 cup boiling water
- 1 jar (24 oz) Morello cherries, drained and juice reserved
- 1 cup heavy whipping cream
- 2 tablespoons powdered sugar
- 1/4 cup Kirschwasser (cherry schnapps)
- Chocolate shavings for garnish
Instructions:
Preheat your oven to 350°F (175°C) and grease and flour two 9-inch round cake pans.
In a large mixing bowl, combine the flour, sugar, cocoa powder, baking powder, baking soda, and salt. Add the eggs, milk, oil, and vanilla extract, and mix on medium speed for 2 minutes.
Slowly stir in the boiling water until the batter is smooth. Divide the batter evenly between the prepared pans and bake for 30-35 minutes, or until a toothpick inserted in the center comes out clean.
Allow the cakes to cool in the pans for 10 minutes, then turn them out onto wire racks to cool completely.
Once cooled, slice each cake in half horizontally to create four layers. Place one layer on a serving plate, brush with some of the reserved cherry juice, and spread a layer of whipped cream and cherries on top.
Repeat with the remaining layers, finishing with a layer of whipped cream on top and garnishing with chocolate shavings.
Extra Tips:
To improve the flavor of your Black Forest Cake, let the cake layers sit overnight in the refrigerator, allowing the flavors to meld together beautifully.
Additionally, if you want a more pronounced cherry flavor, feel free to mix some chopped cherries into the whipped cream filling.
For a fun variation, consider adding a sprinkle of almond extract to the whipped cream for a nutty undertone.
Finally, always use high-quality cocoa powder and cherries for the best results!
Chocolate Cherry Black Forest Cake
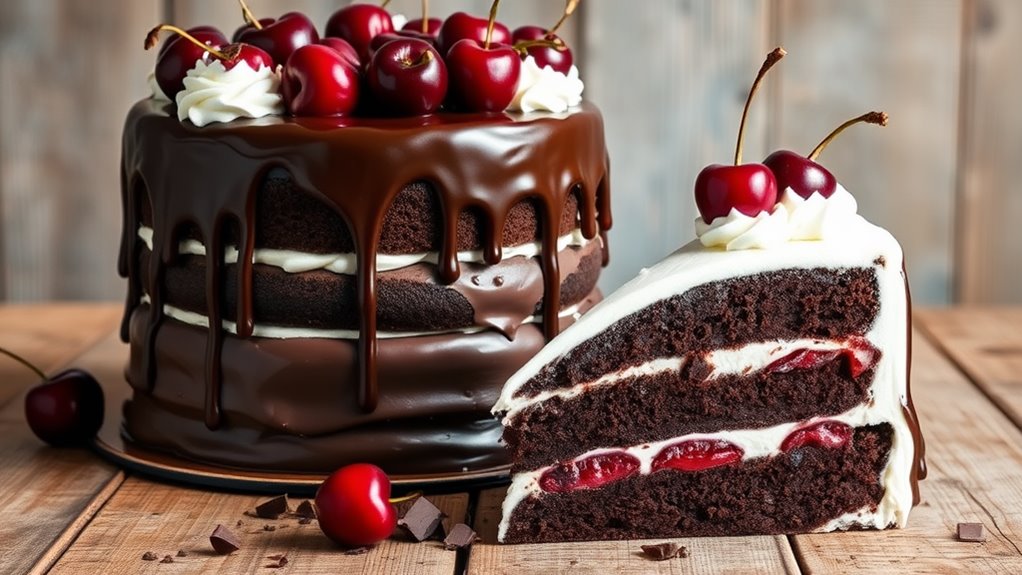
Chocolate Cherry Black Forest Cake is a decadent dessert that combines rich chocolate layers with luscious cherry filling and creamy whipped topping. This classic German cake is perfect for any celebration and is sure to impress your guests with its impressive presentation and delightful flavors.
With a few simple steps, you can create a homemade version that rivals any bakery's offering, allowing you to indulge in the delightful combination of chocolate and cherries right at home.
Ingredients:
- 1 ¾ cups all-purpose flour
- 1 ¾ cups granulated sugar
- ¾ cup unsweetened cocoa powder
- 1 ½ teaspoons baking powder
- 1 ½ teaspoons baking soda
- 1 teaspoon salt
- 2 large eggs
- 1 cup whole milk
- ½ cup vegetable oil
- 2 teaspoons vanilla extract
- 1 cup boiling water
- 1 jar (24 oz) Morello cherries, drained (reserve juice)
- 1 cup heavy whipping cream
- 2 tablespoons powdered sugar
- 1 teaspoon vanilla extract (for whipped cream)
- Chocolate shavings or curls (for garnish)
Instructions:
Preheat your oven to 350°F (175°C) and grease two 9-inch round cake pans.
In a large bowl, combine the flour, sugar, cocoa powder, baking powder, baking soda, and salt. Add the eggs, milk, oil, and vanilla extract, and mix until well combined. Gradually add the boiling water to the batter, mixing until smooth.
Divide the batter evenly between the prepared pans and bake for 30-35 minutes, or until a toothpick inserted into the center comes out clean. Allow the cakes to cool in the pans for 10 minutes before transferring them to wire racks to cool completely.
Once cooled, slice each cake in half horizontally to create four layers. On the first layer, spread a thin layer of whipped cream and top with half of the cherries. Place the second layer on top and repeat the process. Continue layering until all layers are stacked.
Frost the top and sides of the cake with the remaining whipped cream and garnish with chocolate shavings.
Extra Tips:
For an added burst of flavor, you can soak the cake layers with the reserved cherry juice mixed with a splash of cherry liqueur before layering them with whipped cream and cherries.
If you want to make the cake ahead of time, you can bake the layers and store them in the refrigerator for up to two days before assembly.
Be sure to whip the cream just before using it to guarantee it holds its shape and remains fluffy. For an elegant finish, consider decorating the top with additional cherries and chocolate shavings for a truly stunning presentation.
No-Bake Black Forest Cake
No-Bake Black Forest Cake is a delightful and indulgent dessert that combines layers of rich chocolate, creamy whipped topping, and sweet cherries, all without the need for an oven.
This easy-to-follow recipe is perfect for warm days when you want a delicious treat but don't want to heat up your kitchen. With its beautiful presentation and luscious flavors, this no-bake version of the classic Black Forest Cake is sure to impress your family and friends.
Ingredients:
- 1 package (14.1 oz) chocolate wafer cookies
- 2 cups heavy whipping cream
- 1/2 cup powdered sugar
- 1 teaspoon vanilla extract
- 1 jar (24 oz) Morello cherries, drained and juice reserved
- 1 cup chocolate shavings or grated chocolate
- Optional: additional cherries for garnish
Instructions:
In a mixing bowl, whip the heavy cream, powdered sugar, and vanilla extract until soft peaks form.
Lay a layer of chocolate wafer cookies at the bottom of a 9-inch springform pan, slightly overlapping if necessary. Drizzle some of the reserved cherry juice over the cookies to moisten them.
Spread a layer of the whipped cream mixture over the cookies, then add a layer of cherries.
Repeat the layers, alternating between cookies, whipped cream, and cherries, until all ingredients are used, finishing with a layer of whipped cream on top.
Refrigerate the cake for at least 4 hours or overnight to allow it to set properly.
Just before serving, garnish with chocolate shavings and additional cherries if desired.
Extra Tips:
For the best flavor, use high-quality chocolate wafer cookies and fresh or jarred cherries.
If you prefer a more intense chocolate flavor, you can add cocoa powder to the whipped cream mixture.
Additionally, letting the cake chill overnight improves the flavors and helps the layers meld together beautifully.
When serving, use a sharp knife to cut clean slices, and consider pairing each slice with a drizzle of cherry juice for added flavor.
Vegan Black Forest Cake
Vegan Black Forest Cake is a delightful twist on the classic dessert, offering all the rich flavors and textures without any animal products. This luscious cake features layers of moist chocolate sponge, a creamy vegan whipped topping, and sweet cherries, making it a perfect treat for any occasion.
Whether you're celebrating a birthday or just indulging for yourself, this vegan version will satisfy your sweet tooth while keeping your conscience clear.
Ingredients:
- 1 ½ cups all-purpose flour
- 1 cup cocoa powder
- 1 cup granulated sugar
- 1 tsp baking soda
- ½ tsp salt
- 1 cup almond milk (or any plant-based milk)
- 1/3 cup vegetable oil
- 1 tbsp apple cider vinegar
- 1 tsp vanilla extract
- 1 cup pitted cherries (fresh or canned)
- 1 can coconut cream (chilled)
- 2 tbsp powdered sugar
- Chocolate shavings (for garnish)
Instructions:
Preheat your oven to 350°F (175°C) and grease two 8-inch round cake pans.
In a large bowl, combine the flour, cocoa powder, sugar, baking soda, and salt. In another bowl, whisk together the almond milk, vegetable oil, apple cider vinegar, and vanilla extract.
Pour the wet ingredients into the dry ingredients and mix until just combined. Divide the batter evenly between the prepared pans and bake for 25-30 minutes, or until a toothpick inserted in the center comes out clean.
Let the cakes cool in the pans for about 10 minutes before transferring them to a wire rack to cool completely.
Once cooled, whip the chilled coconut cream with powdered sugar until fluffy. Assemble the cake by layering one chocolate cake, spreading a layer of whipped coconut cream, adding a layer of cherries, and topping with the second cake.
Finish with more whipped cream and chocolate shavings.
Extra Tips:
For the best texture, verify your coconut cream is thoroughly chilled before whipping.
You can also improve the flavor of your cake by adding a splash of espresso to the batter or a bit of cherry liqueur to the cherries for an adult twist.
If you're using fresh cherries, consider pitting and soaking them in a little bit of sugar for 30 minutes to draw out their juices and intensify their sweetness.
Don't hesitate to experiment with different plant-based milk or sweeteners to suit your taste!
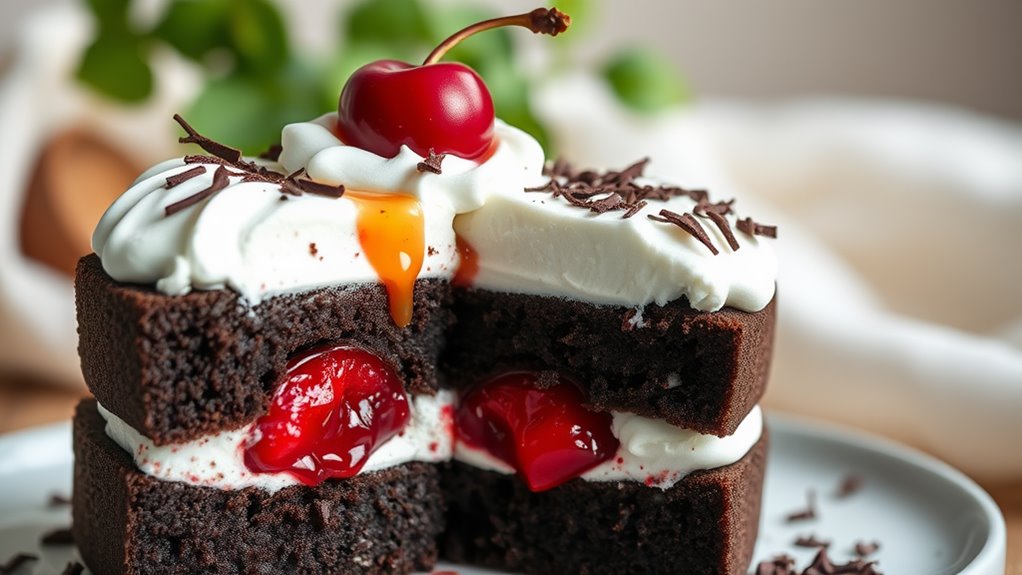
Mini Black Forest Cakes
Mini Black Forest Cakes are delightful individual desserts that bring the classic flavors of the traditional Black Forest Cake into a smaller, more manageable size.
These mini cakes feature layers of rich chocolate cake, sweet whipped cream, and tart cherries, all beautifully presented in charming portions. Perfect for parties or special occasions, they're sure to impress your guests with their elegance and deliciousness.
Ingredients:
- 1 cup all-purpose flour
- 1/2 cup unsweetened cocoa powder
- 1 cup granulated sugar
- 1 teaspoon baking powder
- 1/2 teaspoon baking soda
- 1/4 teaspoon salt
- 1/2 cup unsalted butter, softened
- 2 large eggs
- 1/2 teaspoon vanilla extract
- 1/2 cup buttermilk
- 1 jar (12 oz) Morello cherries, drained and juice reserved
- 1 cup heavy whipping cream
- 1 tablespoon powdered sugar
- Chocolate shavings (for garnish)
Instructions:
Preheat your oven to 350°F (175°C) and grease a muffin tin or line it with paper liners.
In a large bowl, whisk together the flour, cocoa powder, sugar, baking powder, baking soda, and salt.
In another bowl, beat the softened butter until creamy, then add the eggs one at a time, mixing well after each addition. Stir in the vanilla extract and buttermilk, then gradually combine with the dry ingredients until just blended.
Divide the batter evenly among the muffin cups, filling each about two-thirds full. Bake for 15-18 minutes or until a toothpick inserted in the center comes out clean.
Allow the cakes to cool in the pan for 5 minutes before transferring them to a wire rack to cool completely.
Once cooled, slice each cake in half horizontally and layer the bottom half with whipped cream and cherries, then place the top half back on and finish with more whipped cream, a cherry, and chocolate shavings for garnish.
Extra Tips:
For the best results, make sure your ingredients are at room temperature before starting, as this helps to create a smoother batter.
You can also improve the flavor by soaking the cake layers in the reserved cherry juice before assembling.
If you don't have buttermilk, you can create a substitute by mixing regular milk with a tablespoon of vinegar or lemon juice.
These mini cakes can be assembled a few hours in advance; just keep them refrigerated until serving to maintain the freshness of the whipped cream.
Enjoy your baking!