Have you ever thought about canning your favorite seasonal flavors? It's a fun way to enjoy delicious treats all year long! From zesty dill pickles that crunch with every bite to sweet peach chutney that's perfect with meats, there's so much to investigate. Imagine spreading classic strawberry jam on warm toast or enjoying spicy tomato salsa at your next gathering. Ready to find out how to whip up these tasty delights? Let's plunge into!
Zesty Dill Pickles
Zesty Dill Pickles are a delightful way to preserve cucumbers while infusing them with tangy flavors. This recipe is perfect for those who enjoy a crunchy, flavorful snack or condiment that pairs well with sandwiches, burgers, or just on its own.
With a combination of fresh dill, garlic, and a blend of spices, these pickles will add a revitalizing zing to your meals. Get ready to begin a canning adventure that will keep your pantry stocked with these tasty treats.
Ingredients:
- 4 cups of cucumbers (preferably pickling cucumbers, sliced into spears or rounds)
- 2 cups of white vinegar
- 2 cups of water
- 1/4 cup of kosher salt
- 1 tablespoon of sugar
- 4 cloves of garlic (peeled and halved)
- 2 teaspoons of mustard seeds
- 2 teaspoons of dill seeds
- 1 teaspoon of red pepper flakes (optional for heat)
- Fresh dill sprigs
Instructions:
In a large pot, combine the white vinegar, water, kosher salt, and sugar and bring to a boil, stirring until the salt and sugar dissolve.
In sterilized jars, layer the cucumber slices with garlic, mustard seeds, dill seeds, red pepper flakes, and fresh dill sprigs.
Once the pickling brine has boiled, pour it over the cucumbers in the jars, making sure they're fully submerged. Seal the jars with lids and process them in a boiling water bath for about 10-15 minutes.
Let the jars cool completely at room temperature before storing them in a cool, dark place for at least 2 weeks for the flavors to develop.
Extra Tips:
When making Zesty Dill Pickles, it's important to use fresh, firm cucumbers to achieve the best crunch.
Consider experimenting with different spices or adding sliced onions or peppers to customize the flavor.
Always verify your jars and lids are properly sterilized to prevent spoilage.
For a milder flavor, reduce the amount of garlic or omit the red pepper flakes.
Finally, remember to label your jars with the date so you can track how long they've been stored!
Classic Strawberry Jam
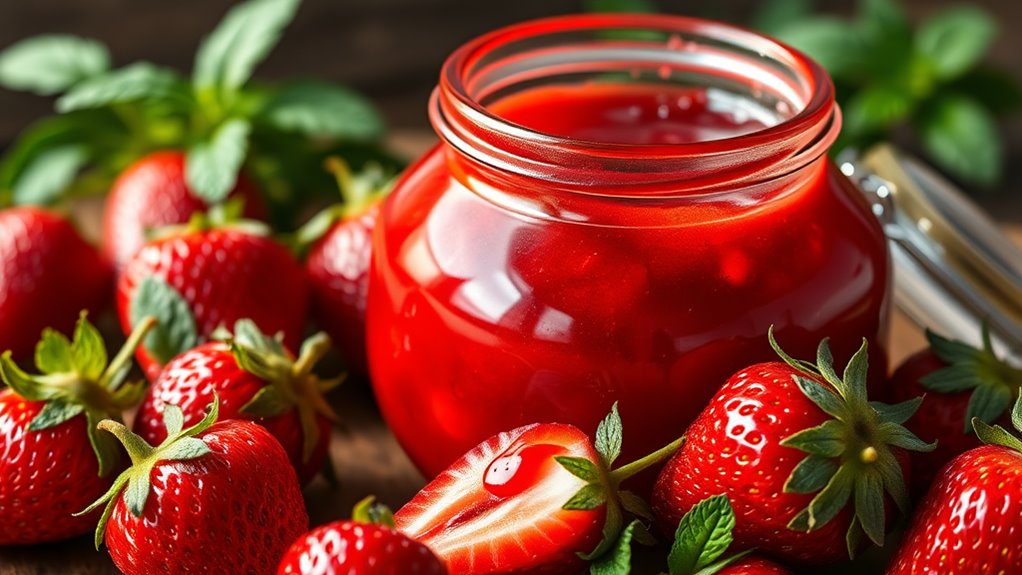
Making classic strawberry jam is a delightful way to preserve the luscious flavor of summer strawberries and enjoy them throughout the year. This simple recipe requires just a few ingredients and can be easily accomplished in your kitchen. Homemade strawberry jam is perfect for spreading on toast, topping desserts, or even giving as a thoughtful gift. With a few easy steps, you'll have jars of sweet, fruity goodness ready to enjoy.
Ingredients:
- 2 quarts fresh strawberries, hulled and sliced
- 1/4 cup lemon juice
- 5 cups granulated sugar
- 1 package (1.75 oz) fruit pectin (like Sure-Jell)
- 1/2 teaspoon butter (optional, to reduce foaming)
Instructions:
In a large pot, combine the sliced strawberries and lemon juice, and crush them slightly with a potato masher.
Stir in the sugar until it's well incorporated, then let the mixture sit for about 10 minutes to allow the strawberries to release their juices.
Afterward, bring the mixture to a boil over medium-high heat while stirring constantly.
Once boiling, add the fruit pectin and continue to boil for another minute or two, stirring frequently until the jam reaches the desired thickness.
To test the consistency, drop a small spoonful onto a cold plate; if it holds its shape, it's ready.
Remove from heat and skim off any foam if desired.
Extra Tips:
For the best results, use fresh, ripe strawberries as they yield the most flavor and sweetness.
Make sure to sterilize your jars and lids beforehand to guarantee a safe and long-lasting product.
If you prefer a smoother texture, you can blend the strawberries before cooking.
Additionally, you can adjust the sugar to your taste, but keep in mind that sugar also helps preserve the jam.
Remember to store your finished jam in a cool, dark place, and refrigerate after opening.
Enjoy your homemade strawberry jam!
Spicy Tomato Salsa
Spicy tomato salsa is a vibrant and zesty addition to any meal, perfect for dips, toppings, or even as a flavorful condiment. This recipe combines fresh tomatoes with a kick of spice, making it a versatile accompaniment that can enhance everything from tacos to grilled meats.
The balance of acidity from the tomatoes and the heat from the jalapeños creates a delightful flavor explosion that will leave your taste buds tingling.
Ingredients:
- 6 ripe tomatoes, diced
- 1 medium onion, finely chopped
- 2 jalapeños, seeded and minced
- 3 cloves garlic, minced
- 1/4 cup fresh cilantro, chopped
- 1 lime, juiced
- 1 teaspoon cumin
- Salt and pepper to taste
In a large mixing bowl, combine the diced tomatoes, chopped onion, minced jalapeños, and minced garlic. Add the chopped cilantro, lime juice, cumin, and season with salt and pepper.
Stir all the ingredients together until well mixed. Allow the salsa to sit for at least 30 minutes to let the flavors meld together before serving.
For canning, pour the salsa into sterilized jars, leaving about 1/2 inch of headspace, and process in a boiling water bath for 15 minutes.
When preparing your spicy tomato salsa, remember that you can adjust the heat by adding more or fewer jalapeños, or by using different types of peppers according to your preference.
For a sweeter flavor, consider adding a small amount of sugar or honey. Don't forget to taste and adjust the seasoning before canning, as this will guarantee your salsa has the perfect balance of flavors.
Finally, always verify that your jars and lids are properly sterilized to maintain freshness and prevent spoilage.
Sweet Peach Chutney
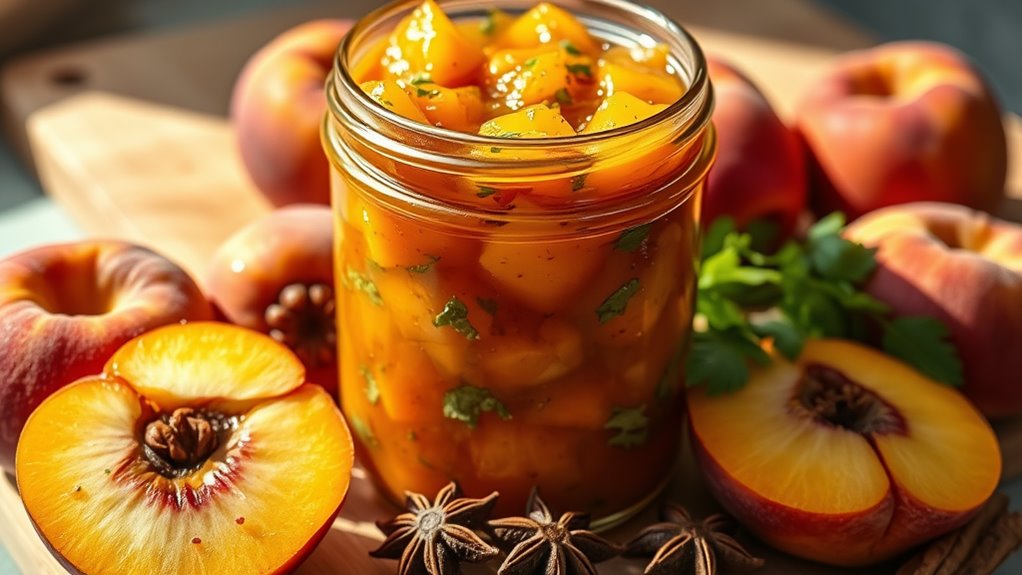
Sweet Peach Chutney is a delightful condiment that captures the essence of summer with its vibrant flavors and enticing aroma. This easy-to-make chutney pairs beautifully with grilled meats, cheeses, or can simply be enjoyed on a slice of crusty bread.
With ripe peaches at the heart of this recipe, you'll create a sweet and tangy relish that's perfect for canning and enjoying all year round.
Ingredients:
- 4 cups diced ripe peaches (about 6-8 peaches)
- 1 cup chopped onion
- 1 cup brown sugar
- 1 cup apple cider vinegar
- 1/2 cup raisins
- 1 tablespoon grated fresh ginger
- 1 teaspoon ground cinnamon
- 1/2 teaspoon ground allspice
- 1/2 teaspoon salt
- 1/4 teaspoon crushed red pepper flakes (optional)
Cooking Instructions:
In a large pot, combine the diced peaches, chopped onion, brown sugar, apple cider vinegar, raisins, ginger, cinnamon, allspice, salt, and red pepper flakes if desired.
Bring the mixture to a boil over medium-high heat, then reduce the heat to low and let it simmer for about 30-40 minutes, stirring occasionally, until the chutney thickens and the peaches break down.
Once cooked, remove from heat and allow it to cool slightly before transferring to sterilized jars for canning.
Extra Tips:
When selecting peaches, opt for those that are slightly soft and fragrant, as they'll provide the best flavor for your chutney.
If you prefer a smoother texture, you can use an immersion blender to puree the chutney to your desired consistency before canning.
Always verify your jars are properly sterilized to prevent spoilage and consider adding a bit of lemon juice for extra acidity if you plan to store the chutney for extended periods.
Enjoy your homemade Sweet Peach Chutney as a versatile addition to your pantry!
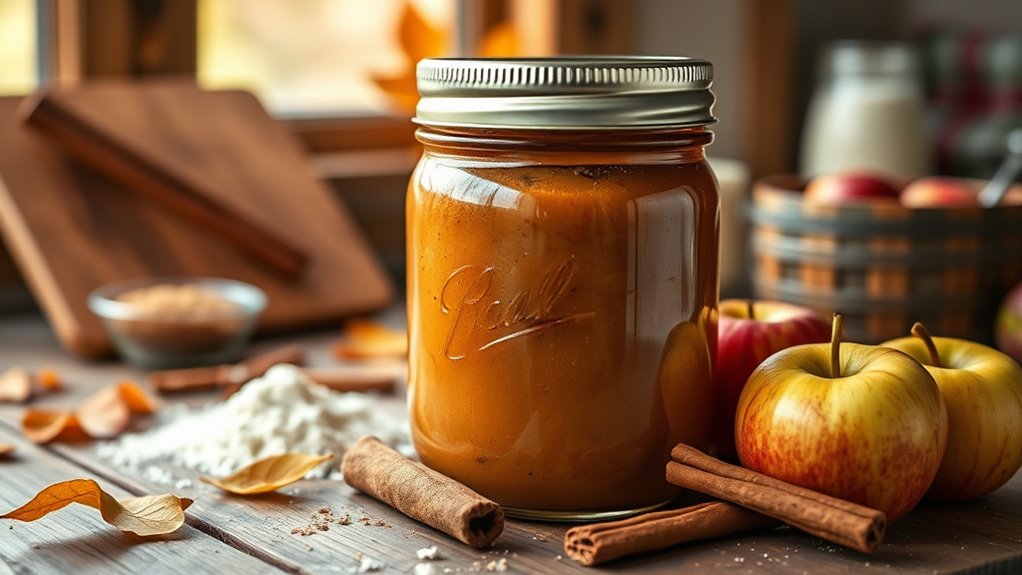
Apple Cinnamon Butter
Apple Cinnamon Butter is a delightful and versatile spread that captures the essence of autumn in every bite. This sweet and spiced concoction is perfect for slathering on toast, pancakes, or biscuits, and it makes an excellent gift for friends and family when canned properly.
The smooth texture combined with the warm flavors of cinnamon and apple create a comforting treat that can be enjoyed throughout the year.
Ingredients:
- 6 cups of peeled, cored, and chopped apples (such as Granny Smith or Honeycrisp)
- 1 cup of granulated sugar
- 1 cup of brown sugar
- 2 teaspoons of ground cinnamon
- 1/2 teaspoon of ground nutmeg
- 1/4 teaspoon of ground allspice
- 1/4 teaspoon of salt
- 1 tablespoon of lemon juice
- 1/2 cup of unsweetened apple cider
- 1/4 teaspoon of vanilla extract
Instructions:
In a large pot, combine the chopped apples, granulated sugar, brown sugar, cinnamon, nutmeg, allspice, salt, lemon juice, and apple cider.
Cook over medium heat, stirring occasionally, until the apples are soft and the mixture begins to bubble. Reduce the heat to low and simmer for about 30-40 minutes, stirring frequently to prevent sticking.
Once the apples are very soft, use an immersion blender or a regular blender to puree the mixture until smooth. Return the mixture to the pot and continue cooking for an additional 10-15 minutes, until thickened.
Stir in the vanilla extract before transferring the hot apple cinnamon butter into sterilized jars, seal them, and process in a boiling water bath for 10 minutes.
Extra Tips:
To guarantee a rich flavor, use a mix of sweet and tart apples. You can also adjust the sugar levels based on your taste preference or the sweetness of the apples used.
Make sure to sterilize your jars and lids properly for safe canning, and allow the apple cinnamon butter to cool completely before storing it in the pantry.
If you want a chunkier texture, blend the mixture less, or simply mash the apples with a potato masher instead of pureeing.